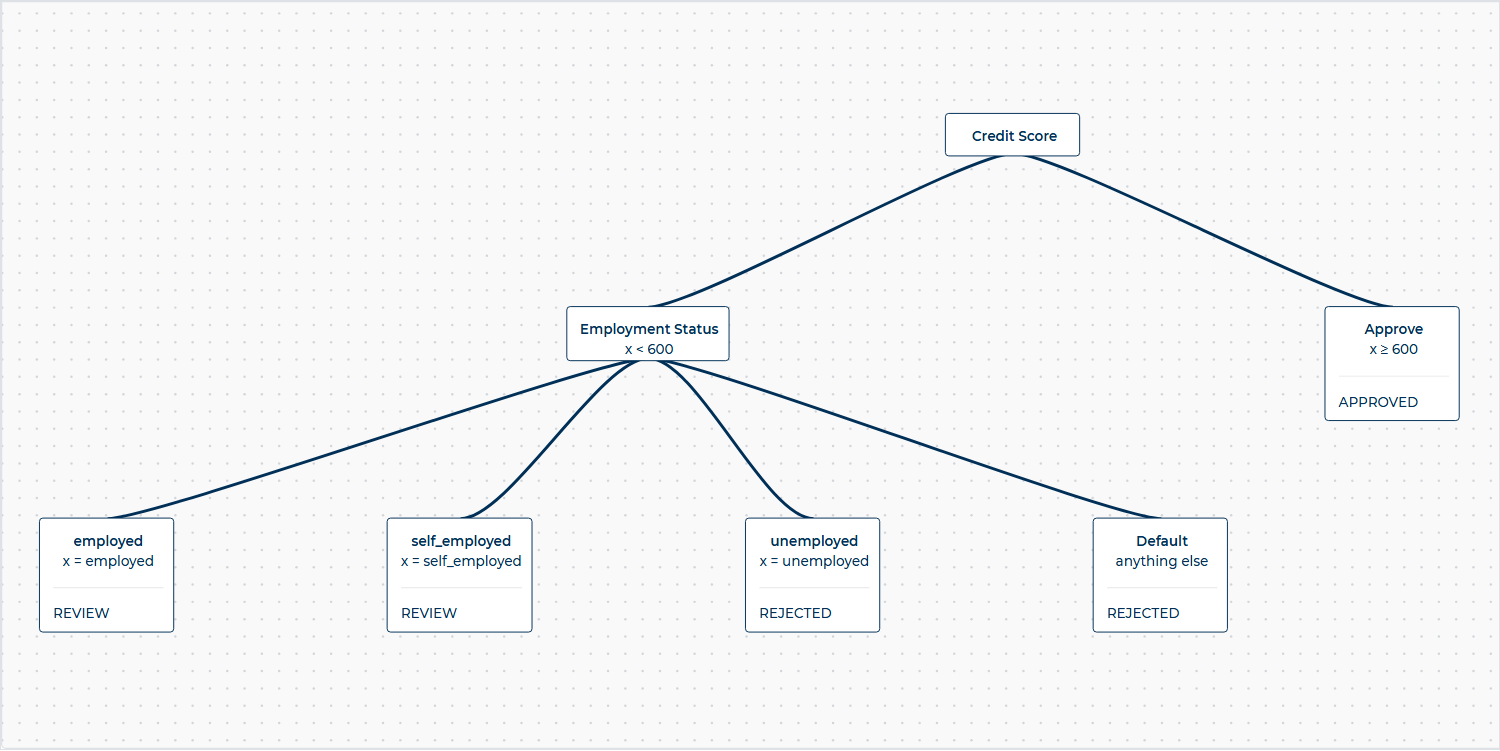
The decision tree allows you to use branching logic to segment decisions based on multiple conditions. It organizes rules into a clear, hierarchical structure, where conditions form the branching points, and the outcomes or actions are defined at the leaf nodes. This makes it ideal for situations where more than two attributes or conditions need to work together to determine a result. The tree structure provides a straightforward way to visualize complex decision-making processes, ensuring clarity in how different conditions lead to specific outcomes.
A finished tree reads left to right as a map of the whole decision: each box branches on one attribute, and every path ends in an outcome.
🎯 Node Conditions: Each node in a decision tree uses the same evaluation operators as other Decisimo components. This includes numeric comparisons, text matching, interval operations, and more. For complete operator reference and examples, see Evaluation Logic Reference.
To add and test a Decision Tree in Decisimo, follow these steps:
-
Access Decision Trees Section:
-
Click the "Decision Trees" button after logging into the Decisimo Dashboard.
-
Create a new decision tree by clicking the "+ Create a decision tree" button.
-
-
Create Decision Trees:
-
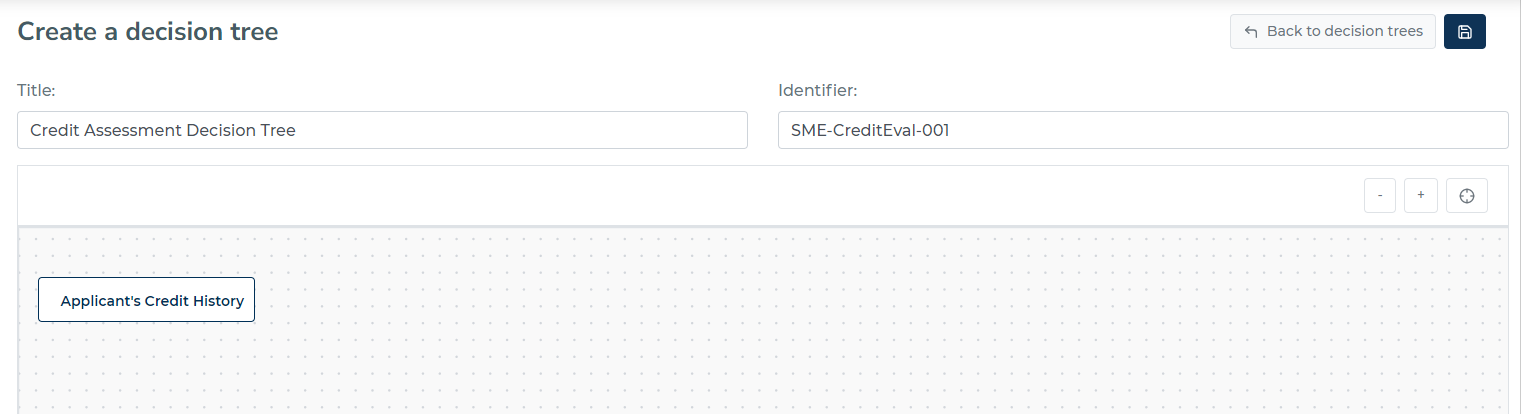
Add Title and Identifier:
-
Enter the title and a unique identifier for the decision tree.
-
-
Define the Root Node:
- Specify the initial condition or attribute that will split the root node.
-
-
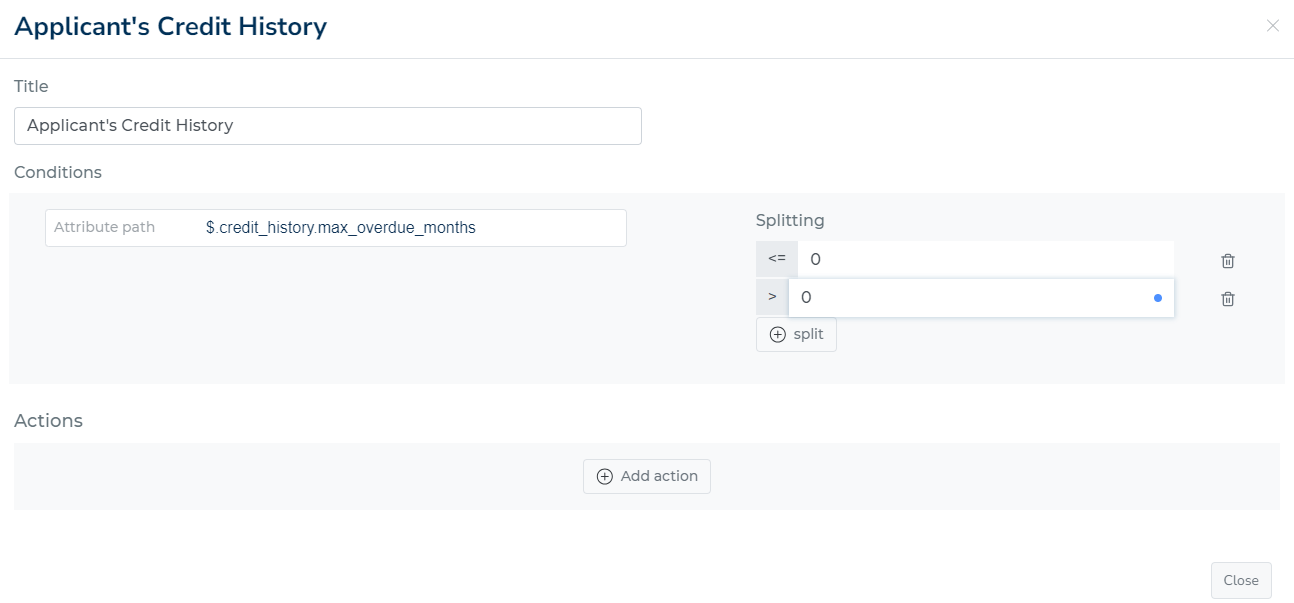
Set node conditions: Click the "⊕ split" button and define the branching condition using any available operator (greater_than, equal_to, closed_interval, etc.).
-
Configure condition values: Set the comparison values for each branch (e.g., change value from 0 to 1, define ranges, set text matches).
📋 Available Operators: Decision trees support all standard evaluation operators including intervals, text matching, and special conditions. See Evaluation Logic Reference for the complete list.
-
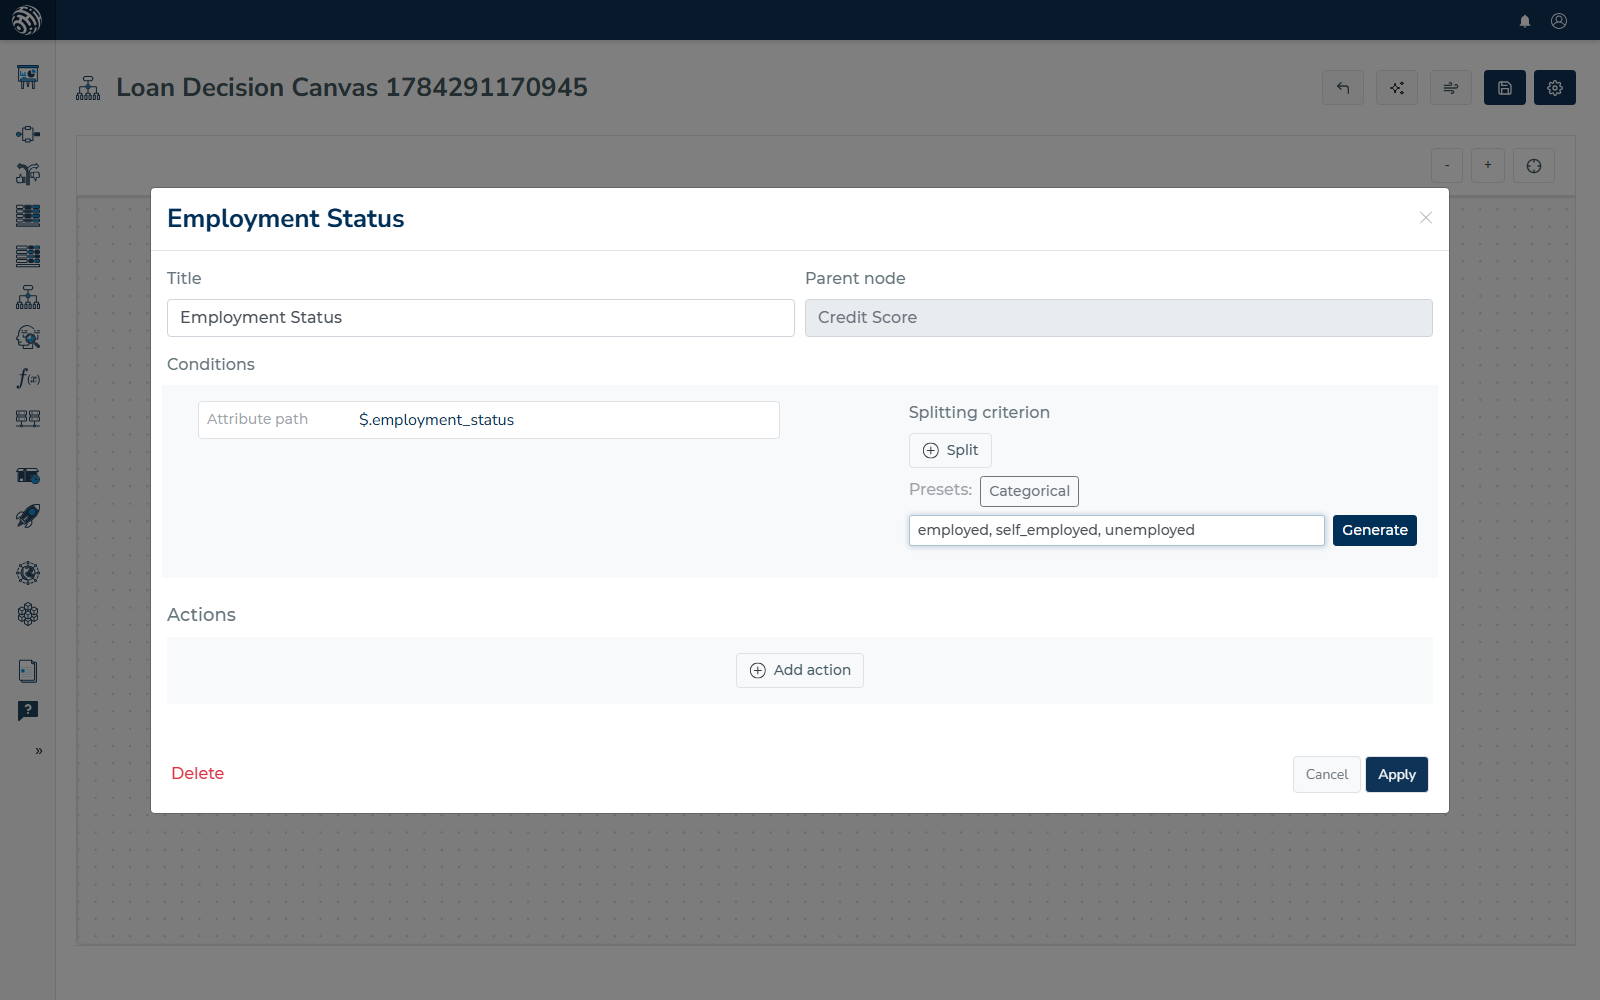
Categorical shortcut: splitting on a text attribute with several known values (a status, a category, a country code) one condition at a time is tedious. Click "Categorical" under Presets, type the values comma-separated, and hit "Generate" — the portal creates one branch per value plus a "Default" branch for anything else, all in one step.
-
The system should accept and save these changes correctly.
-
Use the UI to add new nodes.
-
Observe the placement and connections of the new nodes.
- Expected Result: New nodes should be placed correctly and connected to the rest of the tree.
-
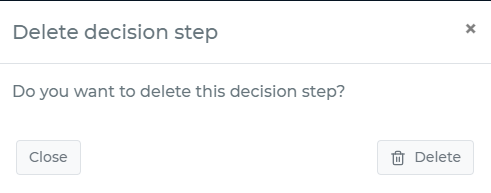
Use the delete function to delete the node, whether it's the parent node or a child node. Deleting the parent node will delete all child nodes associate with it.
-
Add the nodes, the required actions, and the attribute path if required. A leaf node's outcome is one or more actions: click "Add action", pick the attribute path to write to, and set its value (e.g.
$.loan_decision=APPROVED).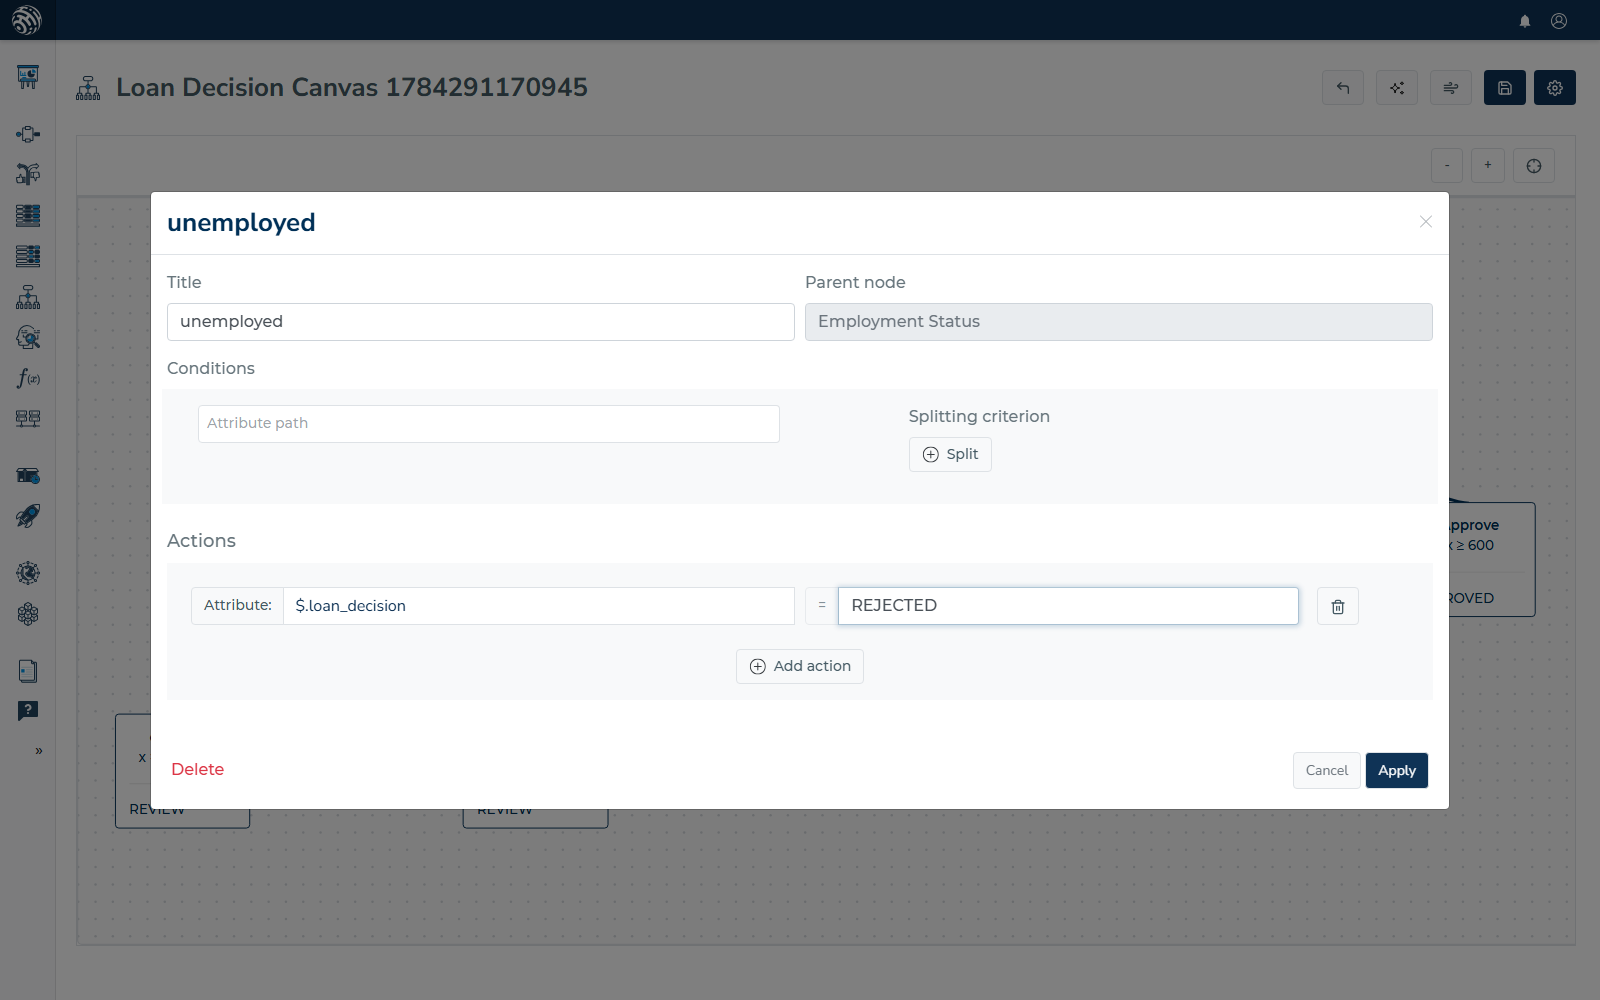
-
Save the Decision Tree.
Attribute Path
For Node Conditions: Attribute paths specify which data field to evaluate at each decision point (e.g., $.credit_score, $.customer.age).
For Node Actions: Attribute paths define where to store results when a path through the tree is completed (e.g., $.loan_decision, $.risk_category).
🎯 JSONPath Examples:
$.credit_score >= 700     // Node condition
$.customer.age < 25       // Nested attribute condition
$.loan_decision = "APPROVED"  // Action result
📋 Complete JSONPath Guide: For comprehensive attribute path syntax, data type handling, and troubleshooting, see JSONPath & Attribute Resolution Guide.
Testing Decision Trees
Decision trees support comprehensive testing to validate your branching logic:
Unit Testing
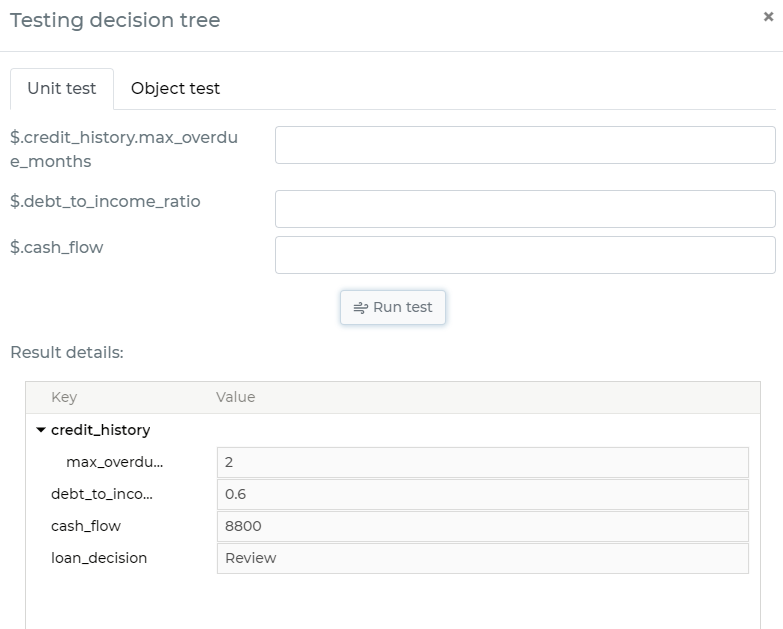
Test with specific values to trace the path through your decision tree:
Batch Testing
When you want to check many records at once, the Batch test tab opens a spreadsheet-like grid — one column per attribute the tree branches on, one row per test record. Paste records straight from Excel with CTRL+V, or type into the blank row that always waits at the bottom. Add an “Expected” column to get PASS or FAIL per row, hit “Run all”, and export the results to CSV. Blank cells are sent as NULL. It works like batch testing for functions.
Value suggestions: the tree already knows the values it branches on, so each cell offers them as you type — every threshold used in a condition on that attribute, plus a value that satisfies each one. Pick from the list instead of guessing which values actually send a record down a given branch.
The result column shows the decision the tree reached: the value written by the last node that acted. When a leaf sets several attributes, the result lists each path and its value. Click the result to unfold the full execution path — every node visited, the condition that matched, and the actions fired.
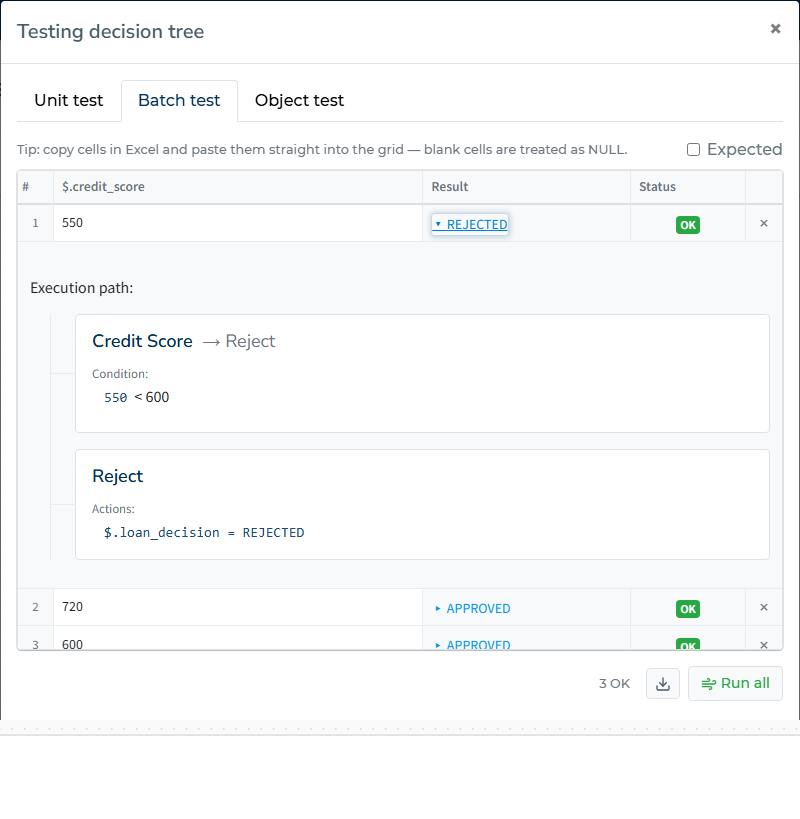
Decision trees have no “Suggest rows” button. Scorecard bins are independent, so the portal can derive one record per bin; a tree record instead has to satisfy every condition along a whole root-to-leaf path at once, which the portal cannot work out for you. The per-cell value suggestions cover the same ground.
Object Testing
Test with complete data objects to validate real-world decision flows and see which path is taken through the tree.
Verbose Output
Enable verbose output to see detailed execution traces:
- Which nodes were evaluated
- What conditions matched at each branch point
- Which actions were executed
- The complete path taken through the tree
🧪 Testing Best Practices: For comprehensive testing strategies, debugging techniques, and understanding execution traces, see Testing Decision Logic and Evaluation Logic Reference.
Revisions
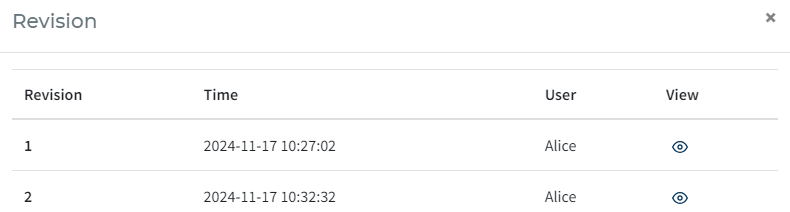
Revision history can tell you what a decision tree looked in the historical version. You can view what was the definition, and who made the changes.
You can see the revision history of a decision tree by clicking “Revisions” from the drop-down menu of “Settings” button icon when viewing a decision tree.
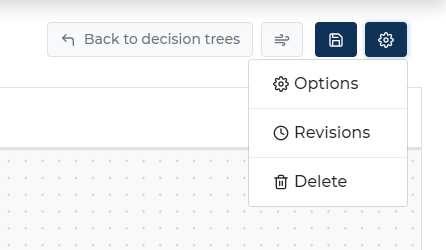
A new modal window will appear after you clicked “Revisions”, with a list of all historical changes and who made them. By clicking the eye icon, you can see the definition of the decision tree at that time.