Building your first case design
A case design describes how one case gets handled: the record types it works with, the tasks that run, and the decisions that finish it. In this walkthrough, you build a small loan review from nothing to a released design, then run it once in Test. A person collects the applicant's income, decision logic turns that income into a decision, and the case completes when the decision reaches the case file. Each stage links to the doc that covers it in depth; the Case Design overview explains the studio itself.
- Create the case design
- Add a record type
- Add a human task
- Add a Decision logic task
- Connect the tasks
- Save and release
- Run a scenario in Test
- Keep building
Create the case design
Open Case designs in the navigation, then press the Case design button (tooltip: Add case design). The create form asks for the design's identity and its decisions:
- Title:
Loan review. - Identifier: a technical name using only letters, numbers, underscores and hyphens. It is pre-filled with a generated value, so replace it with
loan_review. - Description: optional, one line about what the case does.
- Decisions: type
decisioninto the first row (the placeholder shows$.decision). Each entry is a case file key, a$.path, or a record type name. The case is complete when its decisions are present on the case file. Add decision adds more rows. - Complete when: leave Any decision present selected. With several decisions, All decisions present makes the case wait for every one of them.
Declare at least one decision now. A design with no decision cannot be released, and the Decisions and completion doc explains why the release check insists on one.
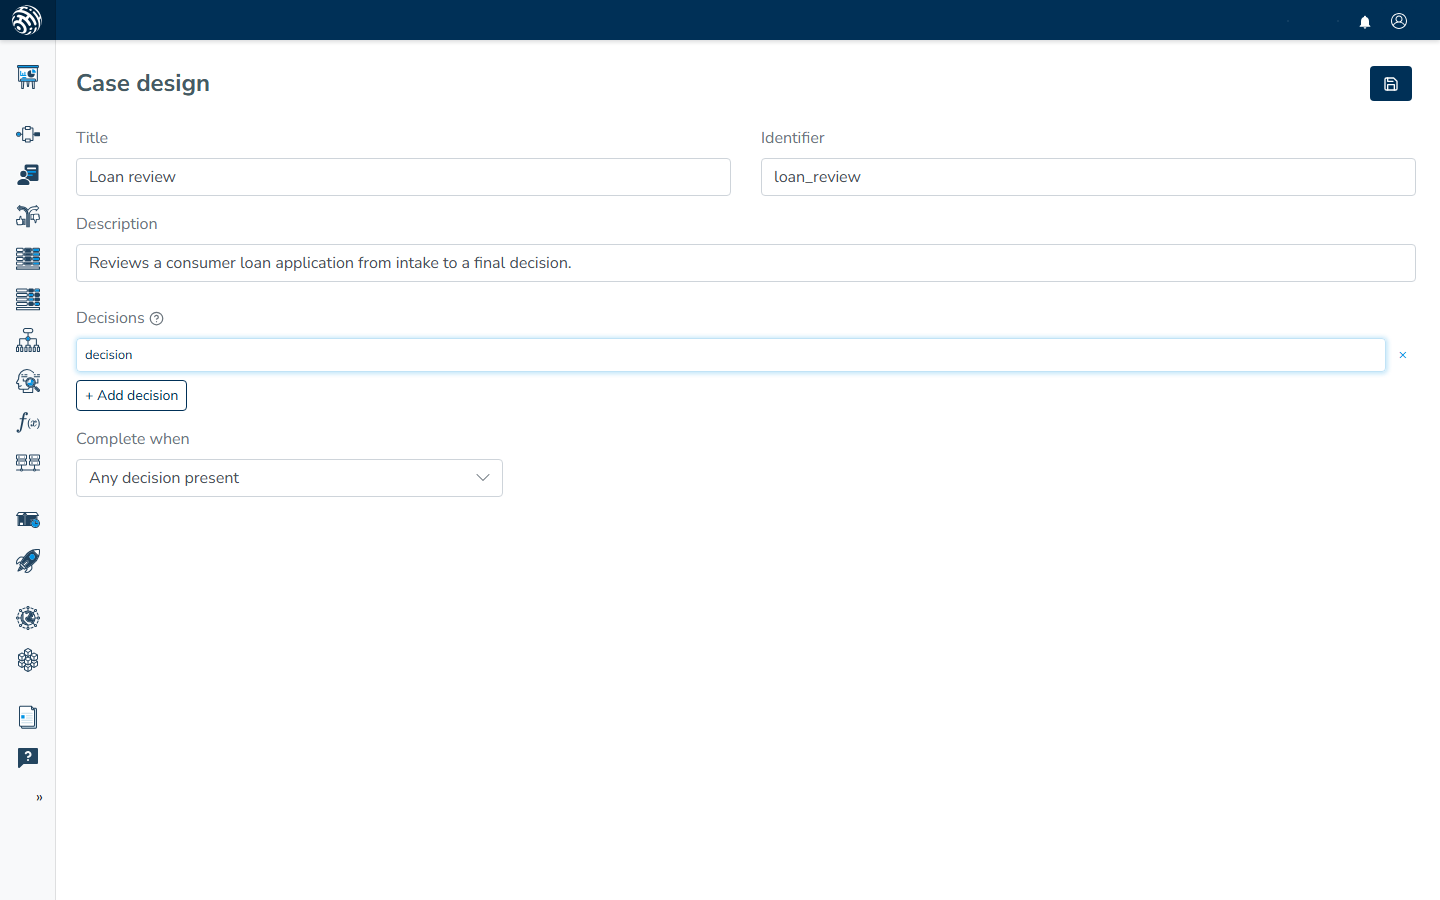
Press Save. The toast says Case design created, and the studio opens on the Tasks section. The left rail lists the eight studio sections (Tasks, Record types, Flow, Impact, Test, Cases, Versions, Settings). The header carries AI Assistant, Release, Save and the Settings menu with Export and Delete. Your title, identifier and decisions are now in the Settings section.
Add a record type
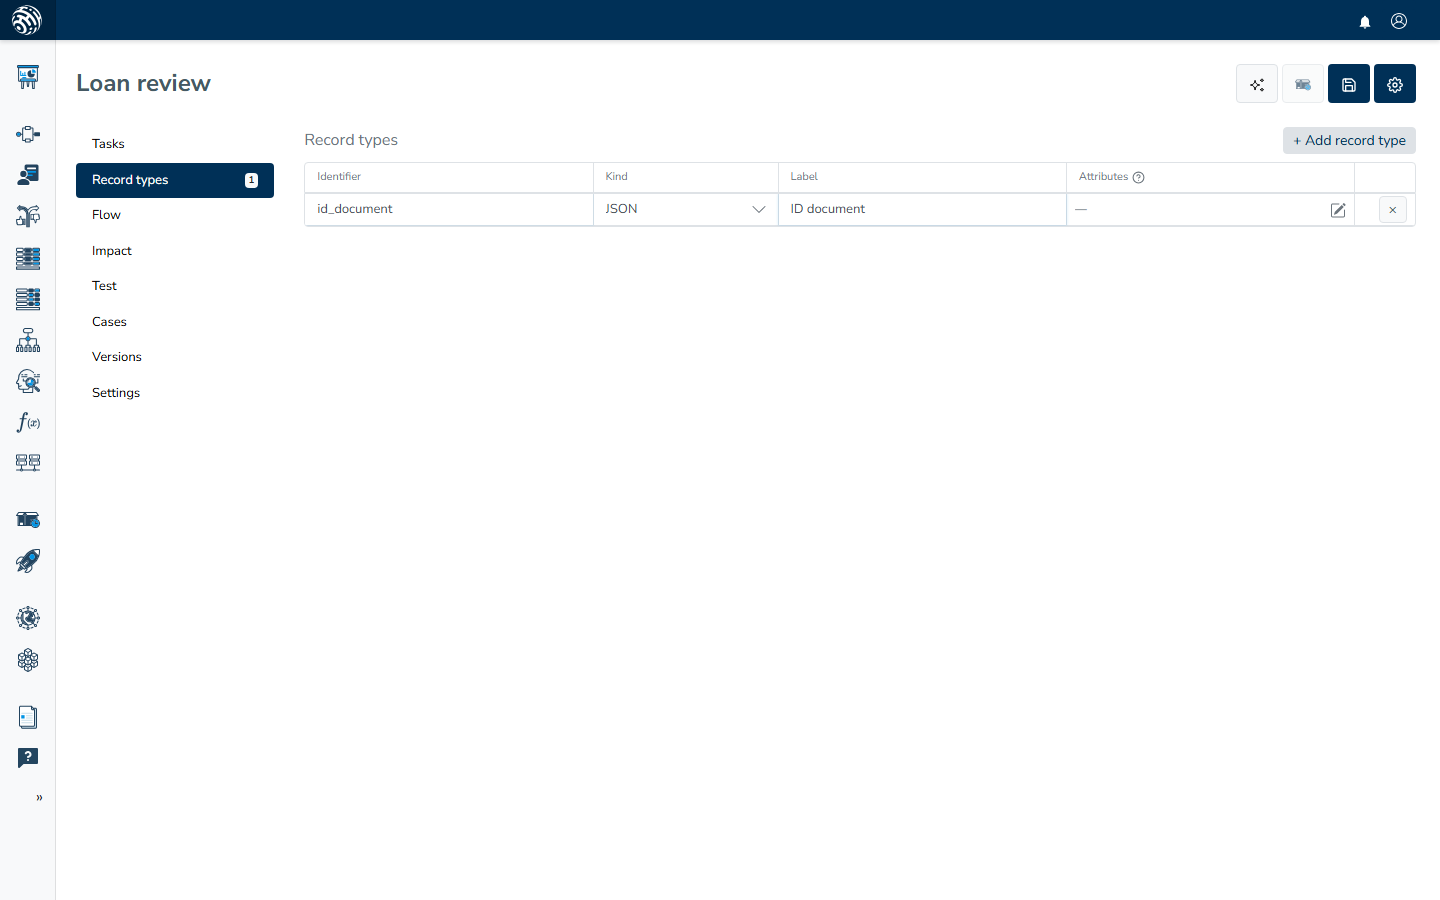
Record types declare the shape of the records a case holds. Here, that record is an uploaded ID document. Open Record types and press Add record type. A grid row appears with four columns:
- Identifier:
id_document(the placeholder shows the same example). - Kind: leave JSON selected. Pick File / blob for record types that carry an uploaded file.
- Label:
ID document. - Attributes: the declared attribute vocabulary, edited in a modal.
Nothing on this page saves on its own. The header Save stores the whole design at once. Record types covers attributes, the identity checkbox and matching rules.
Add a human task
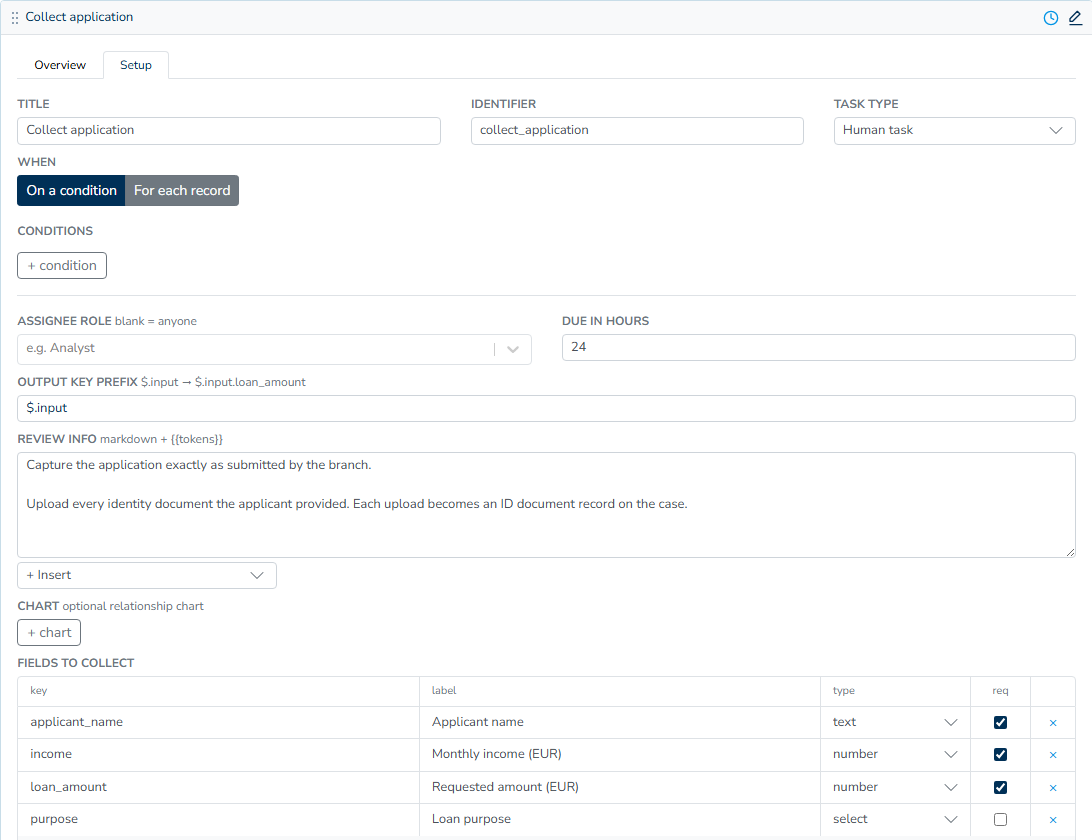
Open Tasks and press Add task. A card appears, already named New task with a generated identifier, and opens on its Overview tab. Switch to Setup, then fill in the top row:
- Title:
Collect application. - Identifier:
collect_application. - Task type: leave Human task selected. The other types are Document OCR, AI, External data, Decision logic and Memo.
Scroll to Fields to collect and press the + field button to add one row. Give it the key income, a label such as Monthly income, type number, and tick the required checkbox. The Output key prefix stays at its default, $, so the submitted answer lands on the case file at income. The API call that opens the case can send the same key. When the payload already carries income, this task completes on its own and the form never opens.
The same section holds Assignee role (blank = anyone), Due in hours and the Review info text shown to the person working the task. Human tasks covers all of it, including file and record fields.
Add a Decision logic task
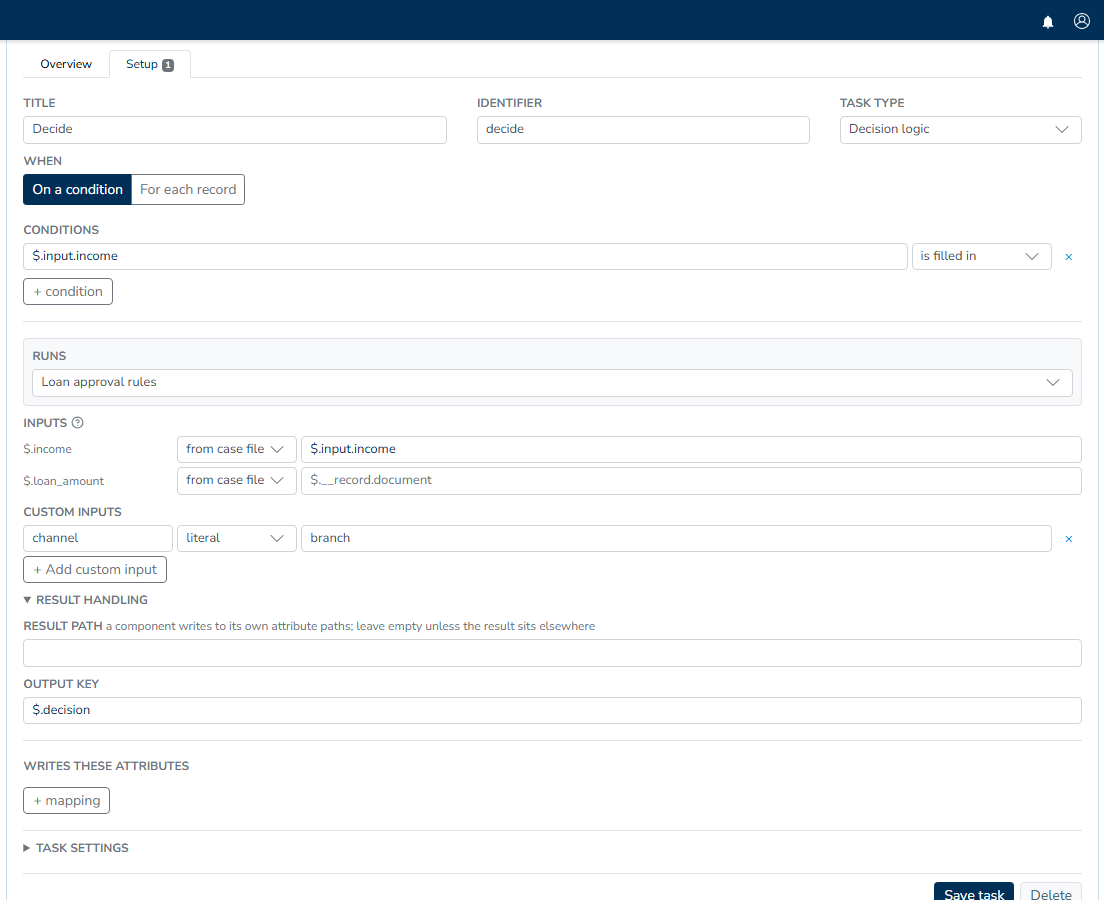
Press Add task again. Set Title to Decide, Identifier to decide, and Task type to Decision logic. Two things make this task work:
- Runs: pick the decision logic to execute. The picker (pick decision logic) groups your existing entities by type: Rule set, Scorecard, Decision table, Decision tree, Function, Decision flow. For this example, pick a rule set that reads an income attribute and answers with an approval. Build one first if you have none; the assistant can also generate it for you.
- Inputs: the rows list the attribute paths the chosen entity reads. The case file is one document, so a rule set that reads
$.incomefinds theincomethe form collected without any mapping, and its row shows that. Map a row only when the logic reads a different name than the case file holds. A path that nothing on the case file supplies resolves to nothing when the task runs, and the logic then decides on empty data.
The Overview tab of any task reads the whole configuration back as sentences, which makes it useful for checking your work. Automated tasks covers the Runs picker for every task type, and Tasks covers the cards themselves.
Connect the tasks
Tasks are not drawn together with arrows. They connect through the case file: one task writes a value, and another task's conditions watch for it.
The condition side. On the Decide card, in the When block, leave the trigger on On a condition. Press the + condition button under Conditions to add one, pick is filled in, and enter $.income as the key. The task becomes eligible as soon as the collected income reaches the case file. All fourteen condition kinds, along with the For each record trigger, are in When a task runs.
The write side. Still on the Decide card, open Result handling and set Output key to decision. The task's result is written to the case file under that key. It matches the decision you declared at creation, so producing it completes the case. Finer-grained writes, including spawning records from results, live under Writes these attributes and are covered in Writing to the case file.
Check your work in the Flow section. The graph draws the collect task feeding the decide task. See Flow and impact.
Save and release
Press Save in the header. Ctrl+S works too. The toast says Case design updated. The whole design is stored as one document, including parent fields, record types and tasks.
Now press the Release button. The button stays disabled while the design is not releasable, and its tooltip names the reason:
- Add at least one task before releasing. Save at least one task first.
- Define at least one final decision before releasing. Declare a decision in Settings.
- This decision is unreachable. No task produces it: some declared decision is written by no task. Give a task an output key or a write that produces it.
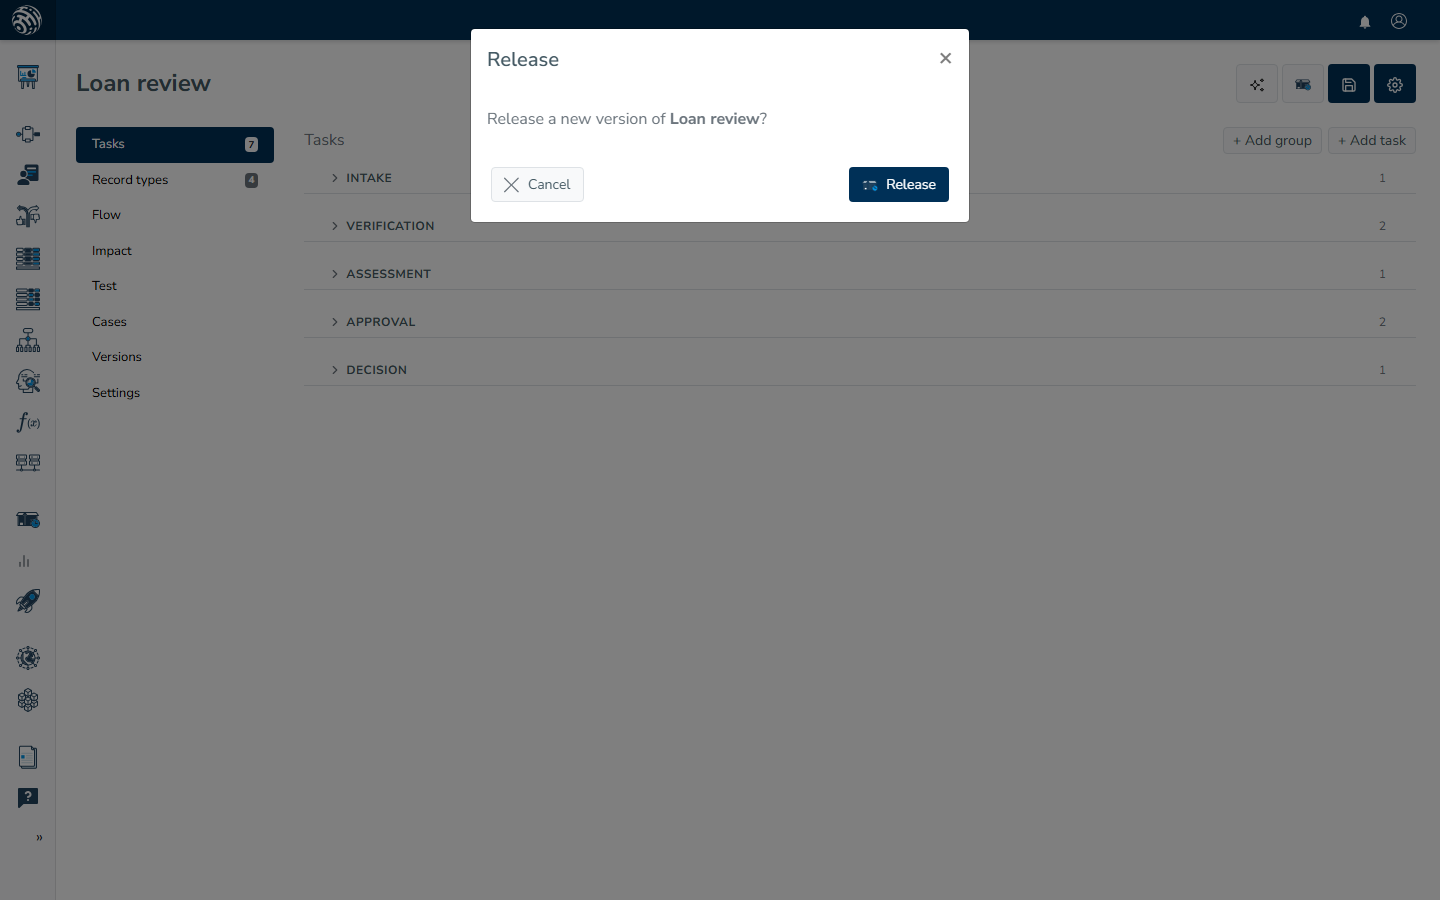
The confirmation dialog asks Release a new version of Loan review, and its Release button publishes it. The toast says Case design released. A release snapshots the design and pushes it to every execution node that runs cases. Releasing documents the server-side validation, and Runtime setup shows how a node and a case board destination are prepared.
Run a scenario in Test
Open the Test section. Testing runs the compiled draft on your runtime host, so it works even before a release. If no host is configured, the pane says Can't load the draft into a runtime. with the hint Testing runs the compiled draft on the tenant's runtime host. Configure one, then retry. (Runtime setup fixes that.)
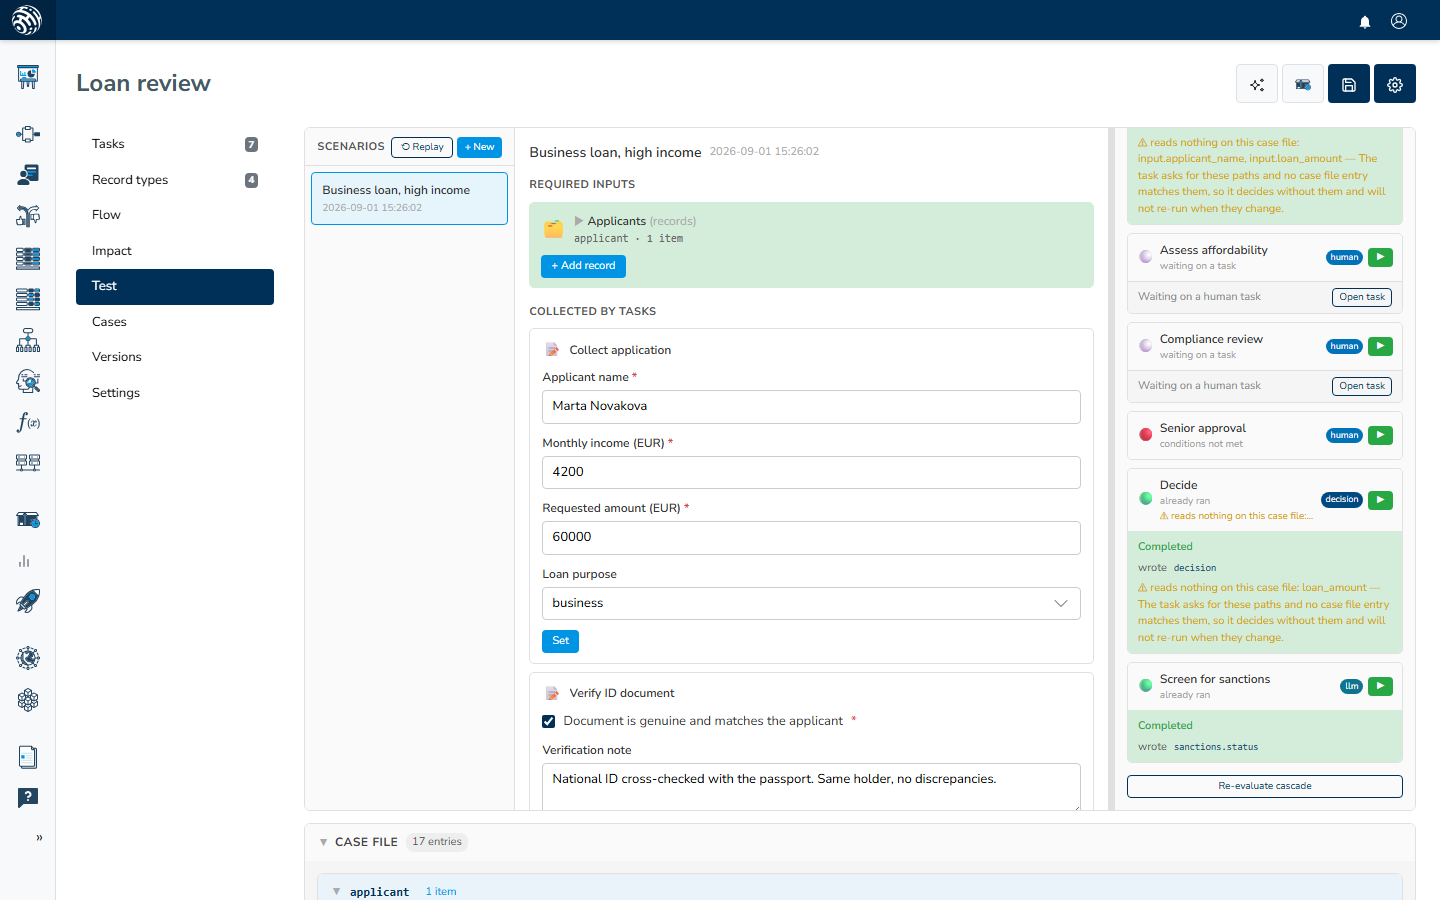
- In the Scenarios column, press + New, keep the suggested name and press Create. A sandbox case opens.
- The middle column lists the inputs. Your human task appears under Collected by tasks as a form. Enter a monthly income and press Set. The button reads Submit once the task itself is waiting.
- The right column, on its Tasks tab, shows one card per task with an eligibility dot and a reason line ("eligible", "conditions not met"). The
Decidecard turns eligible once the income is on the case file, so press its run button. - The card reports completed and lists what the run wrote, including
decision. The Runs tab keeps the feed of every run; opening one shows its Input, Result and Trace. The Outlook tab answers what is still owed before the case can finish. - The Case file panel below the columns lists every entry with its value and version history.
Re-evaluate cascade re-checks every task after an edit. The Test studio doc covers uploads, record forms and run details.
Keep building
The design now has one path from input to decision. From here:
- Give the human task a real form and briefing text: Human tasks.
- Add OCR, AI or external data lookups: Automated tasks.
- Let tasks spawn and process records: Record types and Writing to the case file.
- Compare versions of the design as it grows: Versions.
- Or describe the next change in plain language and let the AI Decision Assistant plan it.