AI Decision Assistant for case designs
The AI Decision Assistant builds and reworks a case design from a plain-language description. Describe what the case should do, and the assistant proposes a plan. Nothing in that plan runs until you approve it. The changes you confirm become real, inspectable decision logic, are applied to the studio when you click, and are stored only when you press Save. The assistant proposes every change; you decide which ones happen.
It is the same assistant you use on decision flows, documented in AI Decision Assistant for decision flows. This page covers the case design version. If you have not built a case design by hand yet, the quickstart shows what the assistant's output is made of.
- Opening the assistant
- Describing what you want
- Reviewing the plan
- The design pane
- Generating and previewing the logic
- When a step fails
- Applying and saving
- What the assistant can and cannot change
Opening the assistant
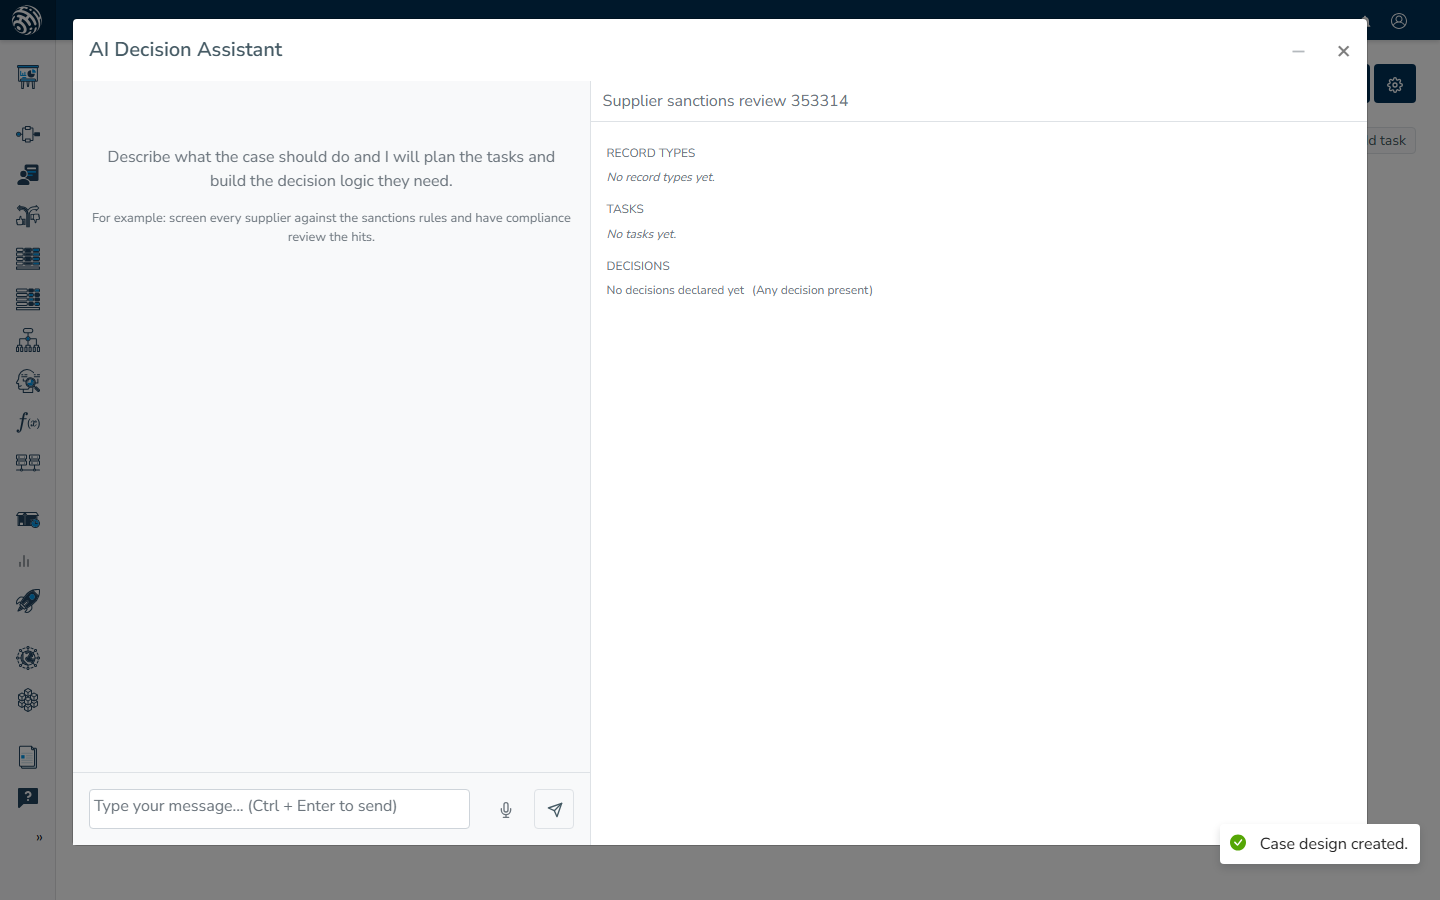
In the case studio header, press the AI Assistant button, shown with the sparkles icon. A modal titled AI Decision Assistant opens in two panes: the conversation on the left and your design on the right. The right pane starts with the design currently held by the studio, including unsaved edits.
The header offers Clear chat to start the conversation over and Minimize to dock the modal as you work in the studio. The conversation stays available while docked. The microphone button next to the input lets you speak a request instead of typing it.
Describing what you want
The empty conversation tells you what to do: "Describe what the case should do and I will plan the tasks and build the decision logic they need." Write the whole intent in one message when you can. A useful description names the tasks and the data they use, then says when the case counts as finished:
Screen every supplier against sanctions before any review. Build a sanctions rule set that flags the company when the country is IR or KP. A compliance officer then reviews flagged companies and records a verdict. The case completes when the verdict exists.
The assistant asks follow-up questions if something is missing. You can also ask what the current design does. A question alone produces no plan. Once it has enough information, the assistant responds with a plan carrying the Plan proposed badge.
Reviewing the plan
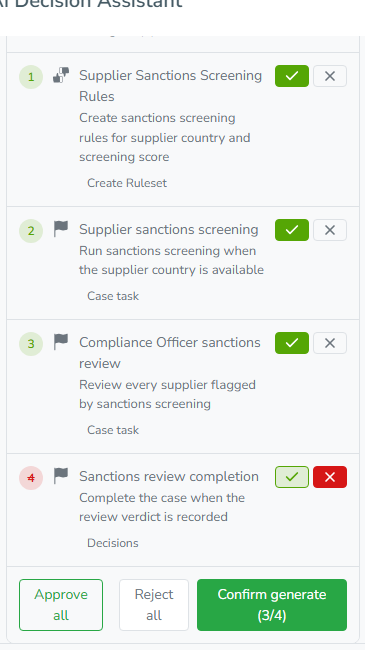
The plan appears as a Planned Changes card inside the assistant's message. It contains one numbered change for each addition or update: a new record type, a new or changed task, a rule set to generate, or decisions to declare. Each item shows its name, a description, and a badge identifying the change.
Every change arrives marked approved. Its pair of buttons, Approve this step and Skip this step, stays visible so you can switch its status for as long as the plan remains open. Approve all and Reject all switch the whole list at once. A skipped change is left out, and the rest of the plan still generates.
The footer's Confirm generate button shows the number of approved changes against the total. Until you press it, nothing is generated. The plan remains a proposal, and the design is untouched. If nothing is approved, pressing it is refused with Please approve at least one step.
Not happy with the plan? Keep talking and ask for a different structure or different thresholds. Each new proposal replaces the old one, and the earlier card collapses to an Earlier proposal line that you can expand to review the history.
A change that runs decision logic also lists the values that logic reads, each with the case file value that supplies it. When the plan leaves a value with no supplier, the assistant adds a field for it to the intake task, named after the path the logic reads, and the plan gains a change named after that task with the note Asks for the values the decision logic reads. The added fields are marked on the card, so nothing the logic needs goes unasked.
The design pane
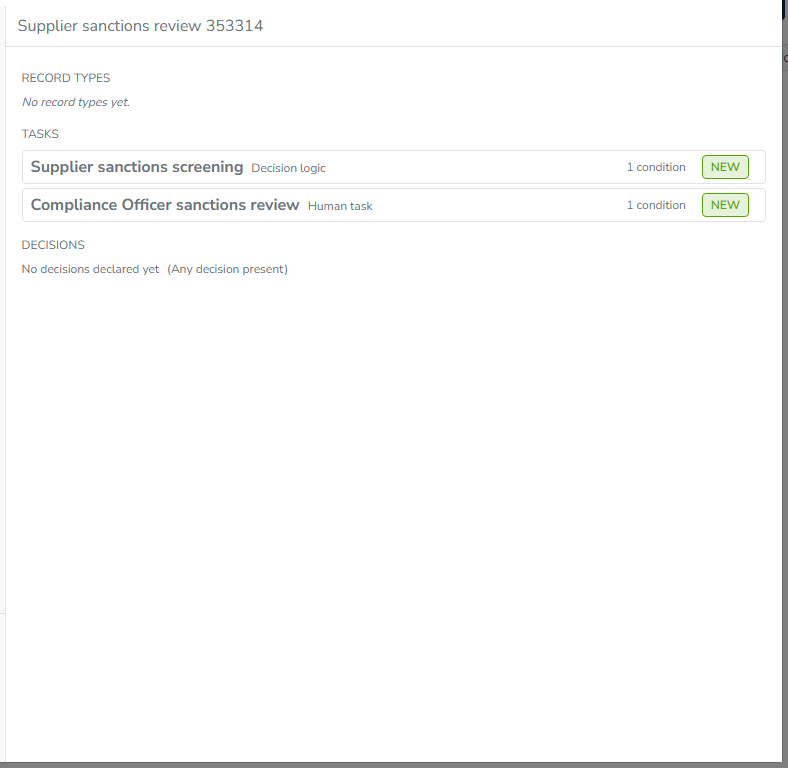
As you review the plan, the right pane projects its approved changes onto your design. It lists three sections:
- Record types, with each row showing its label and, when the plan declares identity attributes, a key chip naming them.
- Tasks, with each row showing its task type and condition count. Expand a row to see its conditions, assignee role, output key, and, for a Decision logic task whose logic the plan is about to create, the note Will run the planned "…" naming that planned entity.
- Decisions, the declared list with its Complete when mode.
Rows the plan would add carry a NEW badge. Changed rows show Modified, and removed rows show Deleted with a strikethrough. Skip a change and its badge disappears immediately, so the pane always answers one question: if I confirm this, what will my design be? Clicking a design change in the plan highlights the row it produces.
Generating and previewing the logic
Press Confirm generate to run the approved changes one by one. Each shows Generating and then Done. Generation writes nothing yet. It produces content for you to inspect.
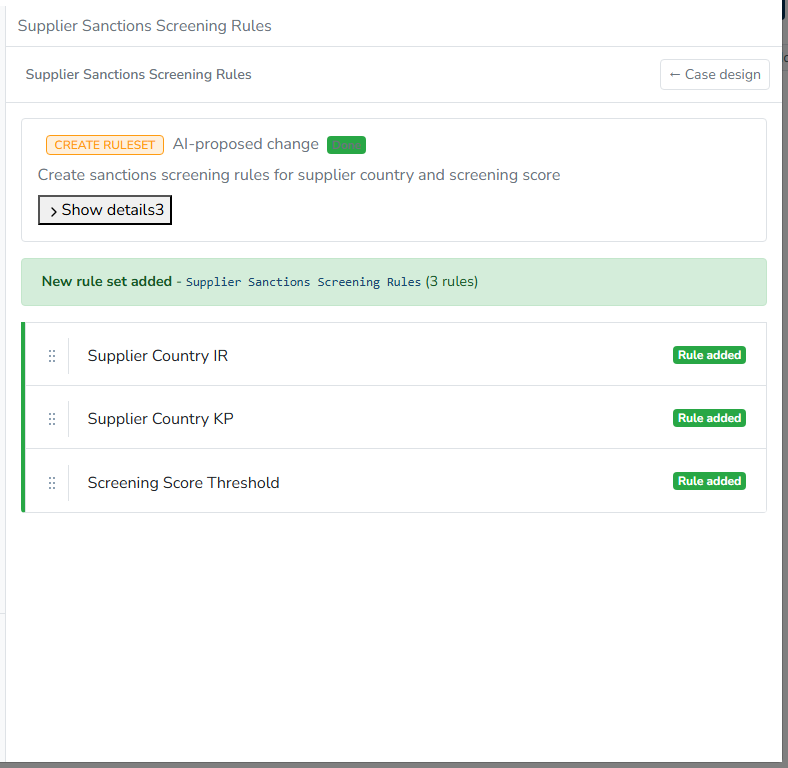
You can click any change. Before generation, the right pane shows that change in detail. After generation, a change that produced decision logic shows the logic itself: the rules of a rule set, the rows of a decision table, or the nodes of a tree. A one-line summary, such as "+3 rules", appears inline on the change with a Click to preview hint. The back button in the pane returns to the design view.
Review the generated logic before building it in, especially its conditions and threshold values. If a value is wrong, say so in the chat. The assistant reworks that change and proposes it again for your approval.
When a step fails
A change that could not be generated is marked Failed, with the line This step could not be generated. and the error detail beneath it. The footer then warns: step(s) failed to generate. The plan can't be built until every step succeeds. A partly generated plan cannot be applied because a remaining change may reference what the failed change was supposed to produce.
Press Retry failed steps. Only the failed changes are generated again. Finished changes keep their results.
Applying and saving
When every approved change is done, the card offers Build this. Pressing it does two things, in order:
- The approved decision logic is created in your account. The rule sets, decision tables, trees, scorecards or functions generated by the plan become real entities, just like ones you build by hand.
- The design changes land in the studio. Task cards appear or change, record type rows and declared decisions update, and every planned task that was to run generated logic is bound to the entity just created. The pane confirms with Applied to the studio. Review the cards and save the design to keep them.
The applied design changes are unsaved studio edits, exactly as if you had typed them. They are stored only when you press Save in the studio header, which writes the whole design in one document. If you leave the studio and never save, the applied design changes are discarded. Decision logic entities created at apply time remain in your account as ordinary entities you can reuse or delete.
If building an entity fails, the toast Could not build: names it. Retry from the plan card and apply again. If a planned entity could not be matched when binding tasks, the toast says No entity was built for: and The case changes were not applied, leaving the design as it was.
What the assistant can and cannot change
With your approval of each change, the assistant can:
- add, change or remove tasks, of any task type;
- add, change or remove record types;
- set the declared decisions and the Complete when mode;
- change the design's title, identifier and description;
- create new decision logic (rule sets, decision tables, decision trees, scorecards, functions) or modify existing entities, and configure the AI model or external data a task runs.
Every one of those changes reaches your design through the same sequence: you approve the change, press Confirm generate, press Build this, and then press Save.
The assistant does not release the design, run or edit live cases, or touch execution nodes or runtime setup. Releasing stays a separate manual action with its own validation.